Using version control and static site building to turn in your homework
Use Git (version control software) and Jekyll (a static site building platform) to publish to Github Pages (a hosting platform).
Overview
Tools: Git, Jekyll, Github.
Concepts: Version control, static site building, markup languages.
Philosophy: Reproducibility, sustainable development.
Assignment
Read How to murder media in 2017.
Complete the “Hello world” Github tutorial.
Watch or read:
- Why use a static site generator
- Blogging in Jekyll (note that instead of a text editor, you’ll use Github directly)
Fork the class repository, add a post to your copy of the repo, and use it to write your first digital journalism critique.
For your critique:
Screenshot the piece in question and make sure it is referenced in your post’s front matter.- Pick a piece of data journalism and talk about what works and what doesn’t about it. Who is the intended audience? Is it clear? Are there things missing you’d like to see?
- Link to the piece in question in your post.
- Write at least 3 paragraphs.
This critique is mostly so that you can get some practice with the mechanics of post creation. It has a secondary goal of letting me know where you’re at when it comes to thinking about data journalism.
Lesson
There’s a tendency to start a class about data and digital journalism with definitions of the field and big philosophical ideas. I prefer a more direct approach.
For your first lesson, you’re going to learn how to turn in your homework.
It turns out that to turn in your homework, you’re going to need to learn a little bit about version control, markup languages, text editors, and static site building. This exercise is going to be frustratingly incomplete – I’ll wave my hands at a bunch of crucial concepts and you’ll probably be confused by many of the steps. That’s the nature of learning this stuff. The key thing is that you’re going to edit a file on your computer and that file is going to become part of a published website.
In this class, we’ll get at the philosophical ideas by doing hands-on work. And we’ll skip the grand definitions of what data journalism is or isn’t altogether. I’m going to show you some things I know about data journalism and try my best to situate them within the broader ecosystem. I don’t care if you leave this course knowing any better what data journalism is or isn’t, but I do care that you leave this class knowing better how you are going to use data and design to deepen and strengthen whatever kind of journalism you aspire to do.
How to turn in your homework: The 10,000 foot view
The full workflow for turning in your homework consists of setting up your computer with the tools needed to publish (which you’ll need to do once/infrequently) and adding posts to your personal blog and contributing them back to the class blog (which you’ll do every week).
Initial setup:
- Get the Github app and Atom text editor
- Fork the class blog repository so that you can work in parallel with all the other students
- Clone your fork of the class blog repository so you can edit files on your computer
Turning in your homework:
- Create or edit your post. Most assignments are expected to be submitted as blog posts.
- Write a description of the changes you made and “commit” your work to the log of changes.
- “Push” your changes to your fork of the class repository so that they will publish on your personal blog.
- Create a “pull request” that will allow me to review your homework submission so that it will be published on the team blog.
Install requirements
Download Atom
Atom is a text editor. You’ll need a text editor for writing structured text, code, and other basic data journalism tasks.
Download Atom for Windows or Mac at https://atom.io/.
If you end up writing a lot of code, you’ll want to get to know your text editor very well. If not, take my word for it – Atom is pretty nice and should let you handle basic text editing tasks just fine.
Get a Github account
Github is a platform for sharing and coordinating code, data, and content. It helps people track changes to code, tasks, and even can publish websites.
Sign up for Github at https://github.com/join.
Download Github Desktop
Github Desktop is a Mac and Windows app that provides the Git version control system, integrated with the Github code hosting platform.
Download Github Desktop for Windows or Mac at https://desktop.github.com/.
Hello version control
Git and Github are foundational technologies for data journalism. I know people who strongly disagree with teaching Git and Github in an introductory class, much less in the first lesson. The critics are right that Git is confusing as hell, and for as magic as it is, Github just makes things even more confusing.
Unfortunately for all of us, you still need to learn it. This part of the process is just gonna hurt a little. That’s why we’re going to skip a lot of concepts in favor of getting you using it for just a few basic publishing tasks over and over. Happily, the Github Desktop app is more accessible and forgiving than other ways of using Git and Github and will let you get started quickly so that you can start building up your version control skills and mental model.
Why is version control so important? Because being able to share and reproduce your work is crucial to developing as a data journalist.
Version control is everywhere. If you’ve ever saved multiple versions of a file, used the Google Docs “history” feature, or Microsoft Word’s “track changes”, you’ve used some kind of version control.
Git is version control software. It lets you track changes in useful, sophisticated ways. But it’s a pretty low-level tool with a learning curve like a steep cliff.
That’s where Github and the Github Desktop app comes in. Github is a website that wraps a bunch of handy Git features in a nice user experience. The Github Desktop app makes it easier to synchronize work you do on your local computer with the Github site. Not only that, Github can publish pages for us.
Let’s start by creating your own copy of the class repository so that you can make changes to the site and submit them back to the main class site. Creating your own, parallel line of work in Github is known as “forking”.
Fork the class repository
Visit https://github.com/digitalframeworks-spring2017/digitalframeworks-spring2017.github.io in your browser. (I know, it’s a semi-ridiculous URL.) You should be logged in to Github, or at least have an account.
Now, click the “fork” button in the upper-left corner of the screen below the black toolbar. You may have to pick an account to fork to if you belong to multiple Github organizations. Otherwise, the process will just begin.
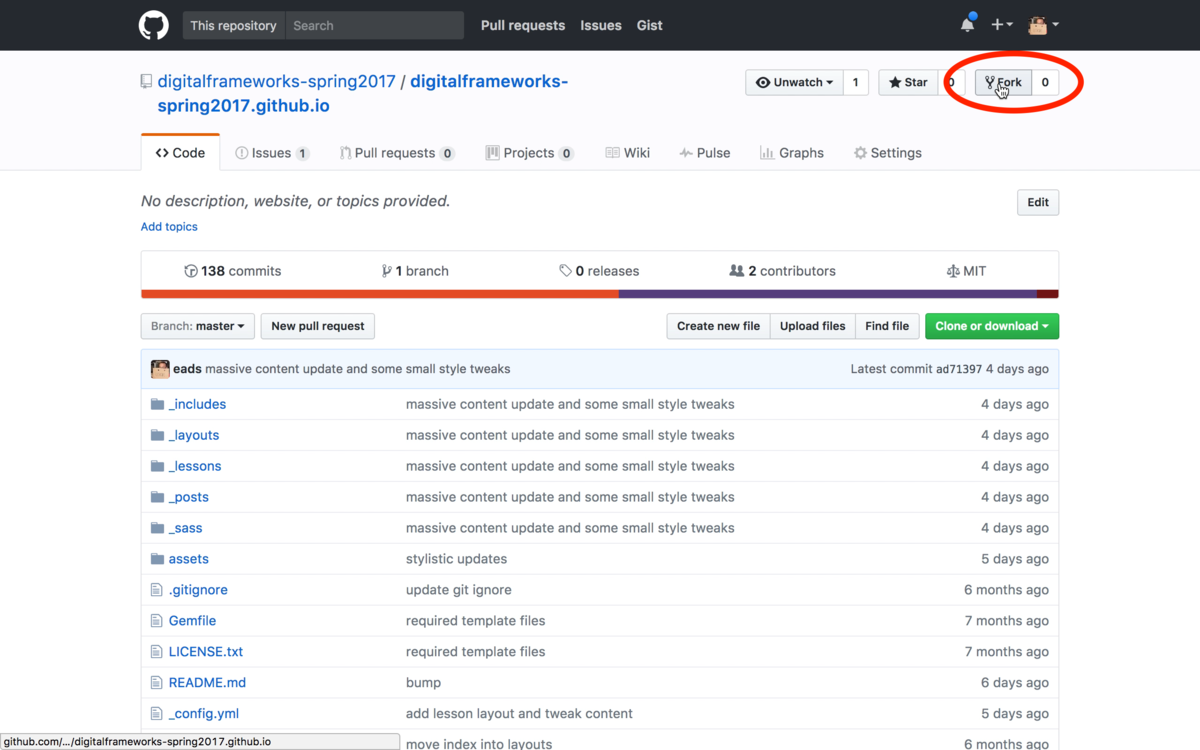
When the forking process is done, you’ll be dropped onto a page with a URL like https://github.com/eads/digitalframeworks-spring2017.github.io.
If you take a look at the URL structure, you’ll see the name of the repository (the last part of the URL) remains the same, but the name of the user/organization (digitalframeworks-spring2017 and eads) varies. The <yourusername> version is your copy of the repository. You can experiment with you copy, goof around, and learn without screwing up the main line of development.
Clone your fork of the repository
Now, open the Github Desktop application and add your version of the class repository to your computer.
In Git terminology, you’ll “clone” the repository from Github onto your personal computer.
Click the little plus in the upper left:
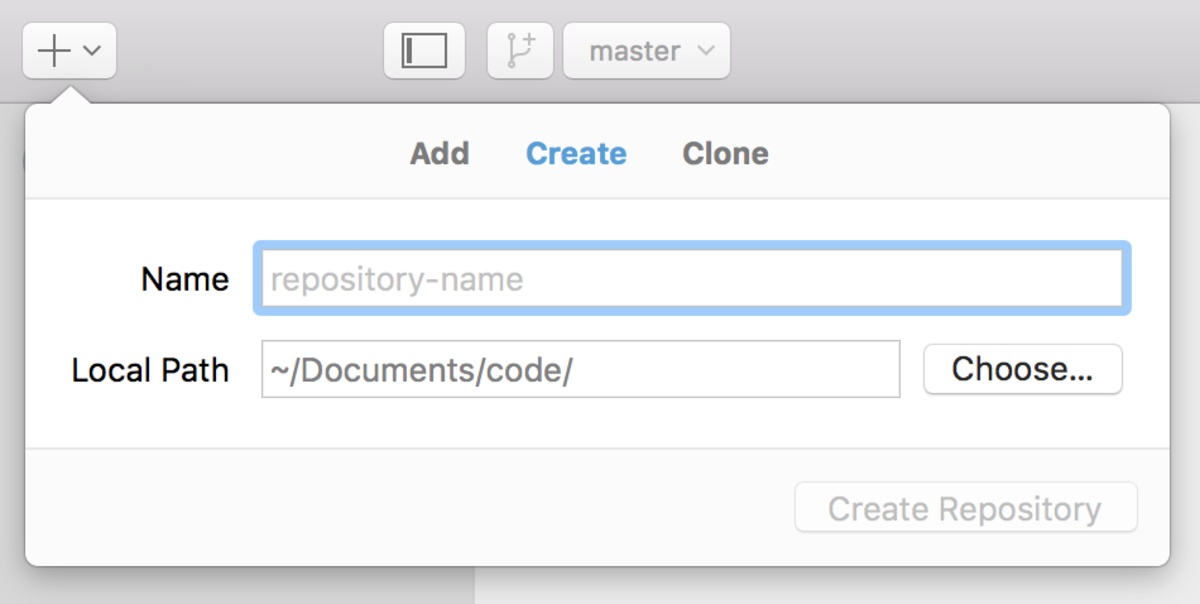
Switch the add repository panel to “clone”:
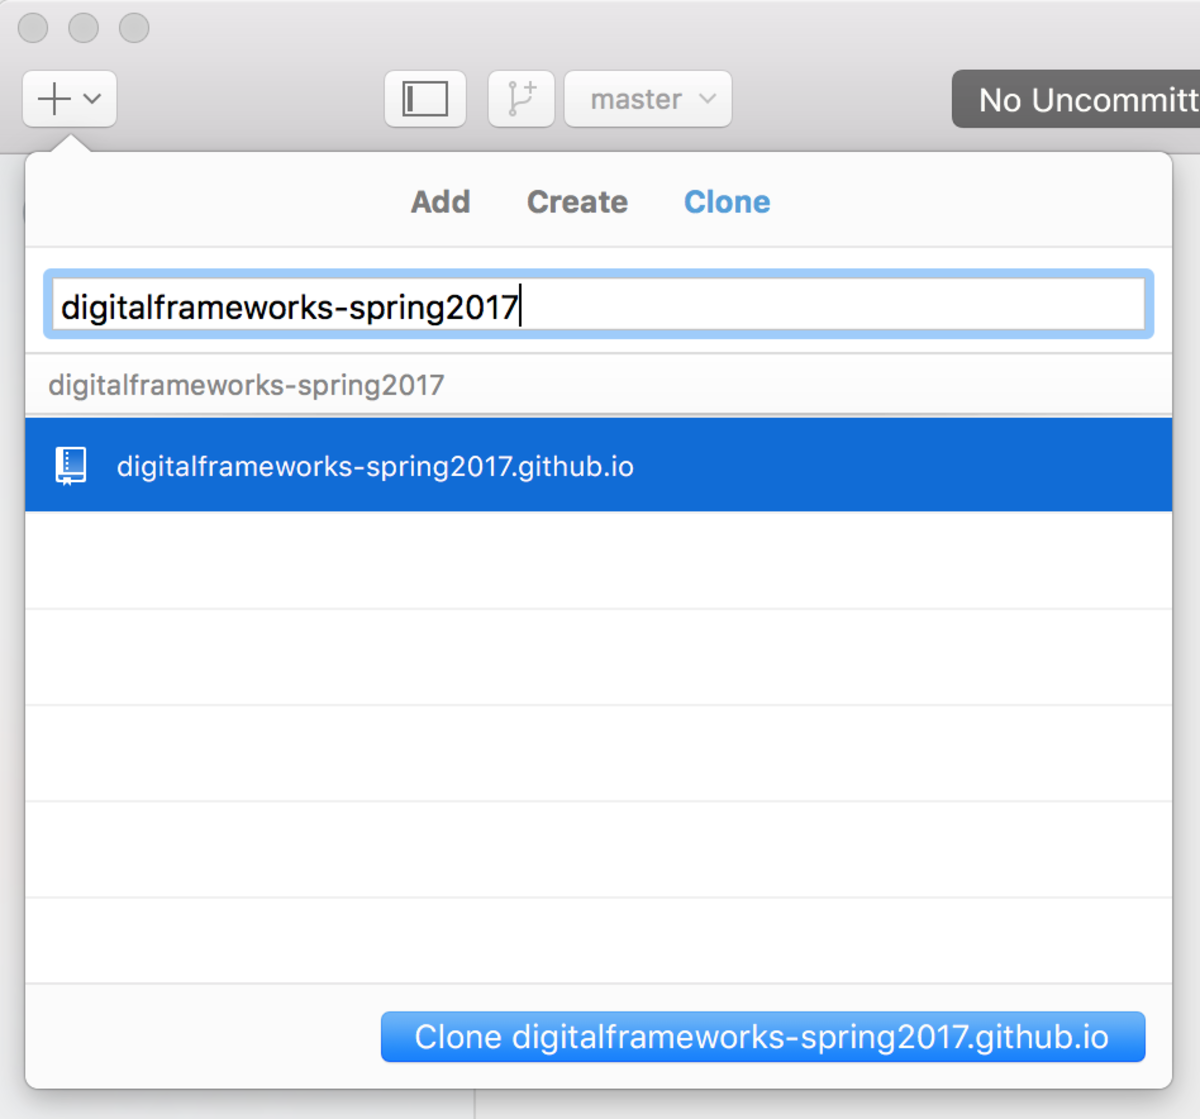
Now find somewhere to put the repository on your computer. It doesn’t matter where, but it should be somewhere you’ll remember and can kind easily.

Now you can work on your site and submit your changes back to the main class site. You’ll use Atom to edit files in your site like posts, Github Desktop to track your changes and push them back to Github, and the Github website to create pull requests that I will review before adding to the main class site.
Hello static site building
We haven’t talked about what’s in the class repository yet. That would be Jekyll source code. You’re going to learn a fair amount about basic Jekyll usage in this class, but for now the important thing to understand is that a Jekyll site is a bunch of files that get stitched into a published website.
You can think of this as a blueprint for creating a website – all the little bits of content, assets like images, themes and styles, and other kinds of data and metadata.
Jekyll is software that takes that blueprint and turns it into a bunch of files (generally speaking, these are HTML, Javascript, CSS, and asset files) that a web browser can read.
Github will automatically build Jekyll sites and host them for free – this service is called Github pages. It also explains the strange and long name of our repository and Github username. This magic naming scheme is what tells Github to build the page.
All sound like greek to you? Let’s create a post and see it in action. Time to open Atom.
Find your site
In Atom, select “Open a Project”…
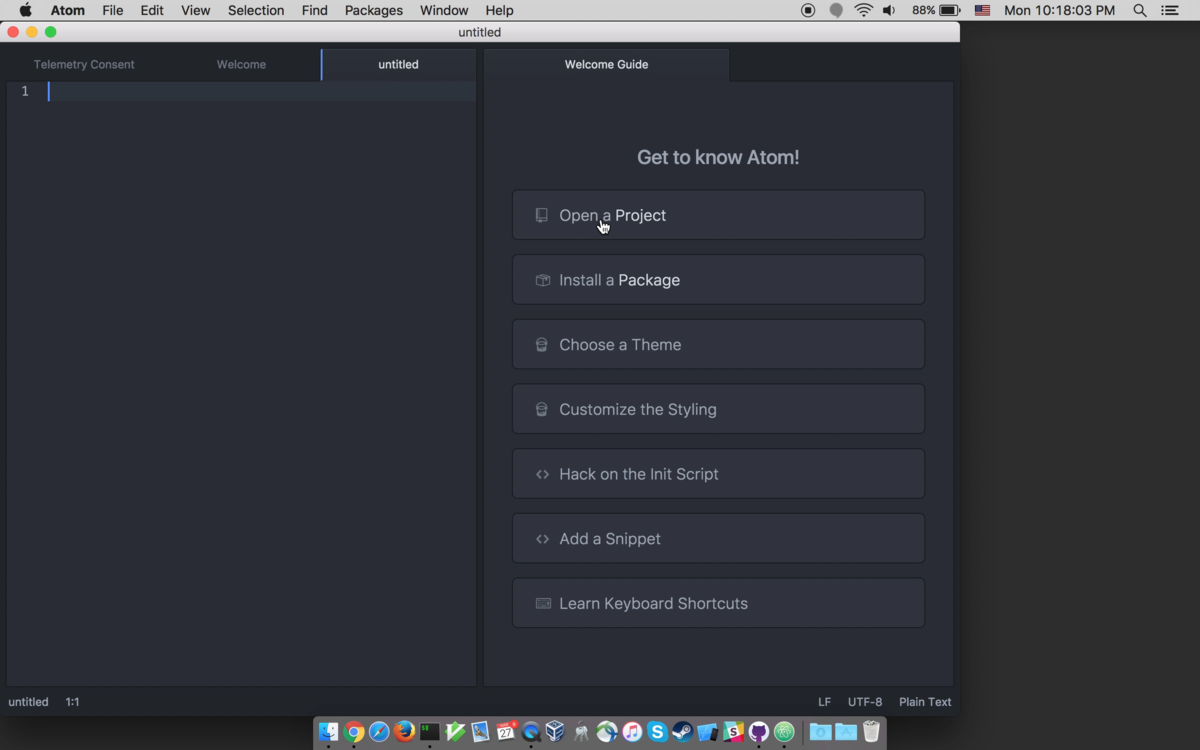
…and find the directory you cloned your repository to in the previous section. Click “Open” to open up a view of the all the project files.

Post basics
Most content management systems you’ve used have some kind of web-based user interface for working with content.
Here’s good old Wordpress:
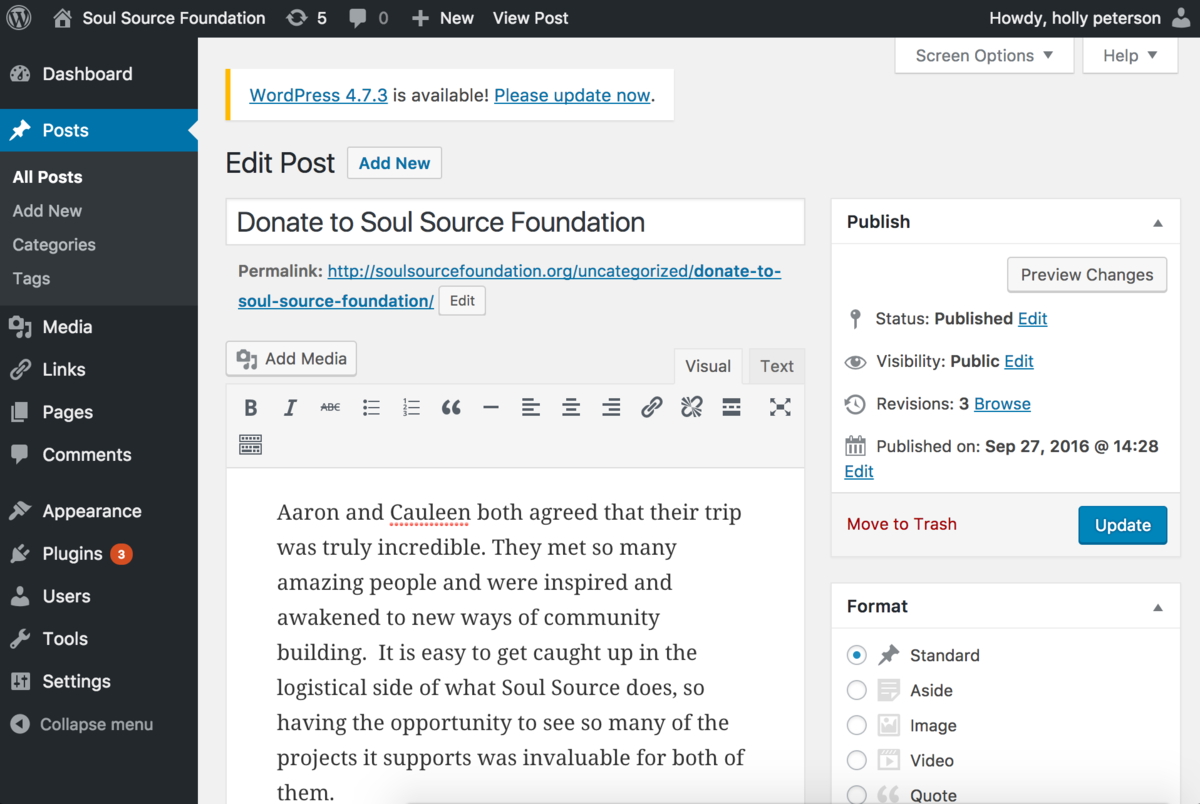
Jekyll works somewhat differently. The “interface” to edit content is just your text editor and some magically named files.
With your project open in Atom, find the _posts directory and open the file called 2016-09-04-markdown-sample.md.
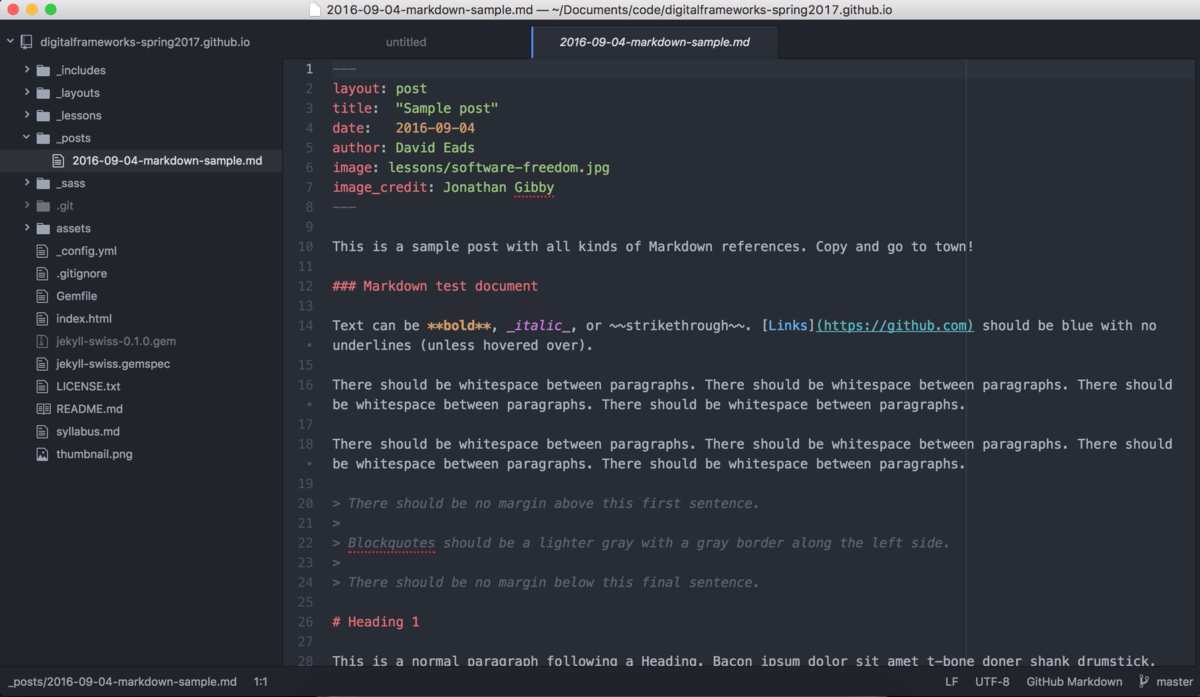
Let’s unpack what we’re looking at:
At the top of the post is a block that looks like:
---
layout: post
title:  "Sample post"
date:   2016-09-04
author: David Eads
image: lessons/software-freedom.jpg
image_credit: Jonathan Gibby
---
This is called front matter. It defines the meta-data that is associated with the post such as the title, who wrote the post, and what image to use when sharing on social media and that will appear at the top of the page.
It is important to note that most of these fields are defined by me, as the person who is developing this particular Jekyll site. While there are just a few pre-defined variables related to how Jekyll processes content, things like the author, title, and image_credit variables were added by the original developer of this Jekyll theme, Diana Mounter or myself.
Everything that comes after the front matter is the body of the post. It looks like this:
This is a sample post with all kinds of Markdown references. Copy and go to town!

### Markdown test document

Text can be **bold**, _italic_, or ~~strikethrough~~. [Links](https://github.com) should be blue with no underlines (unless hovered over).

There should be whitespace between paragraphs. There should be whitespace between paragraphs. There should be whitespace between paragraphs. There should be whitespace between paragraphs.

There should be whitespace between paragraphs. There should be whitespace between paragraphs. There should be whitespace between paragraphs. There should be whitespace between paragraphs.

> There should be no margin above this first sentence.
>
> Blockquotes should be a lighter gray with a gray border along the left side.
>
> There should be no margin below this final sentence.

...
This is written in a format Markdown. Markdown is kind of magic and occasionally infuriating, but is by far the most popular way to write structured content that is still readable by other human beings.
We won’t worry too much about the specifics of Markdown yet, in part because Atom automatically helps format Markdown in ways that make it pretty easy to understand.
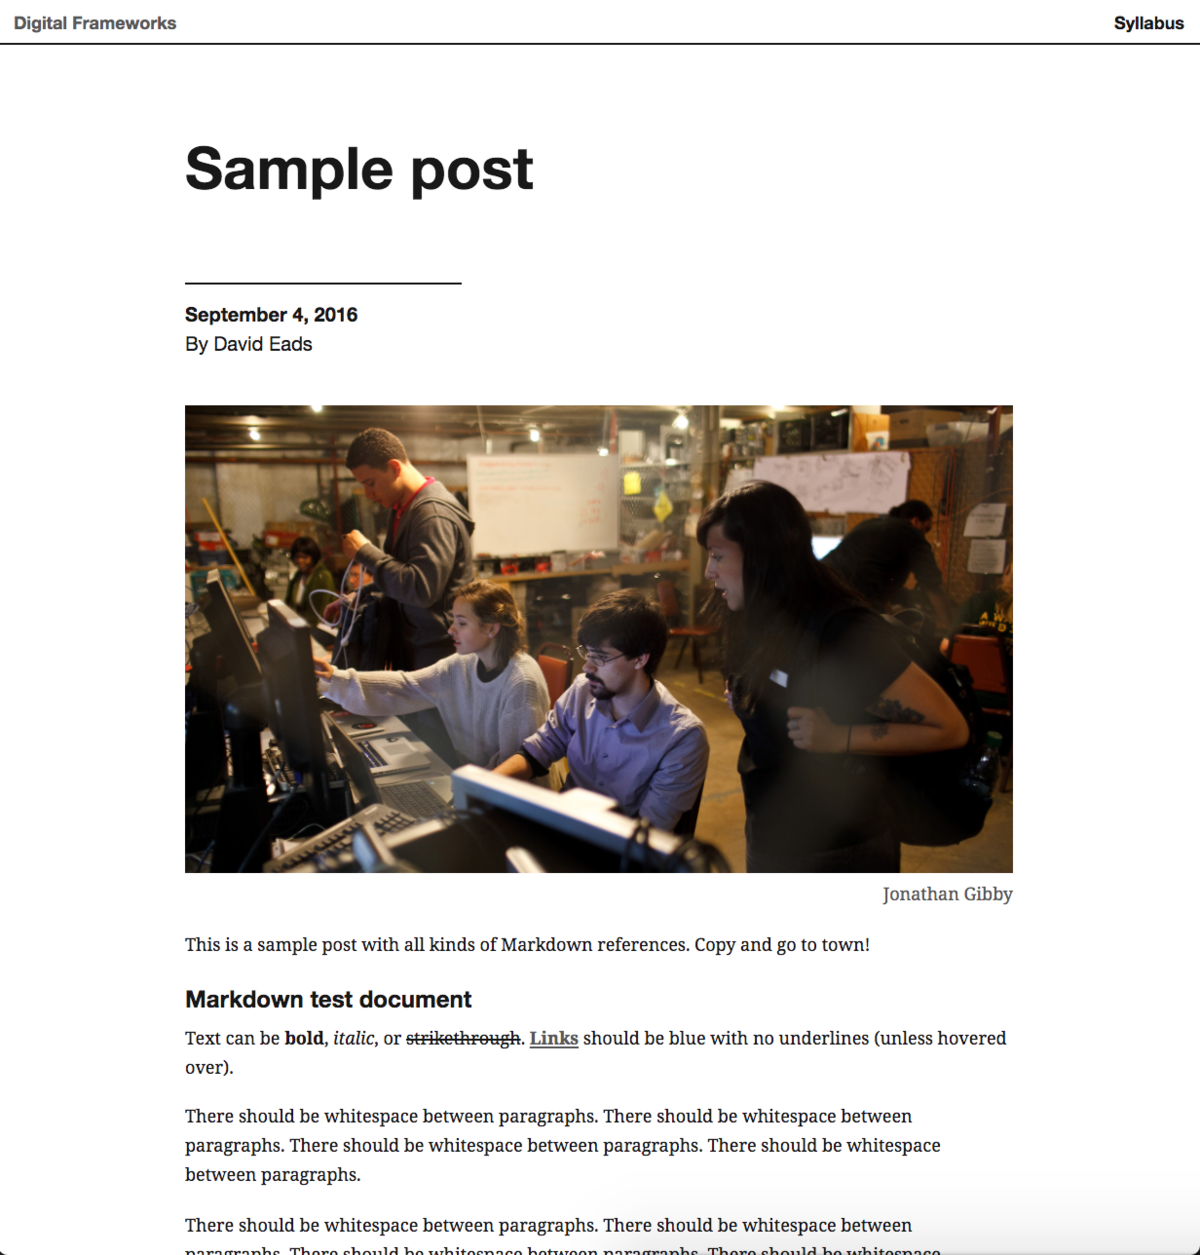
Jekyll turns this whole thing into a post that, in our theme and system, looks like this:
Copy and edit your own post
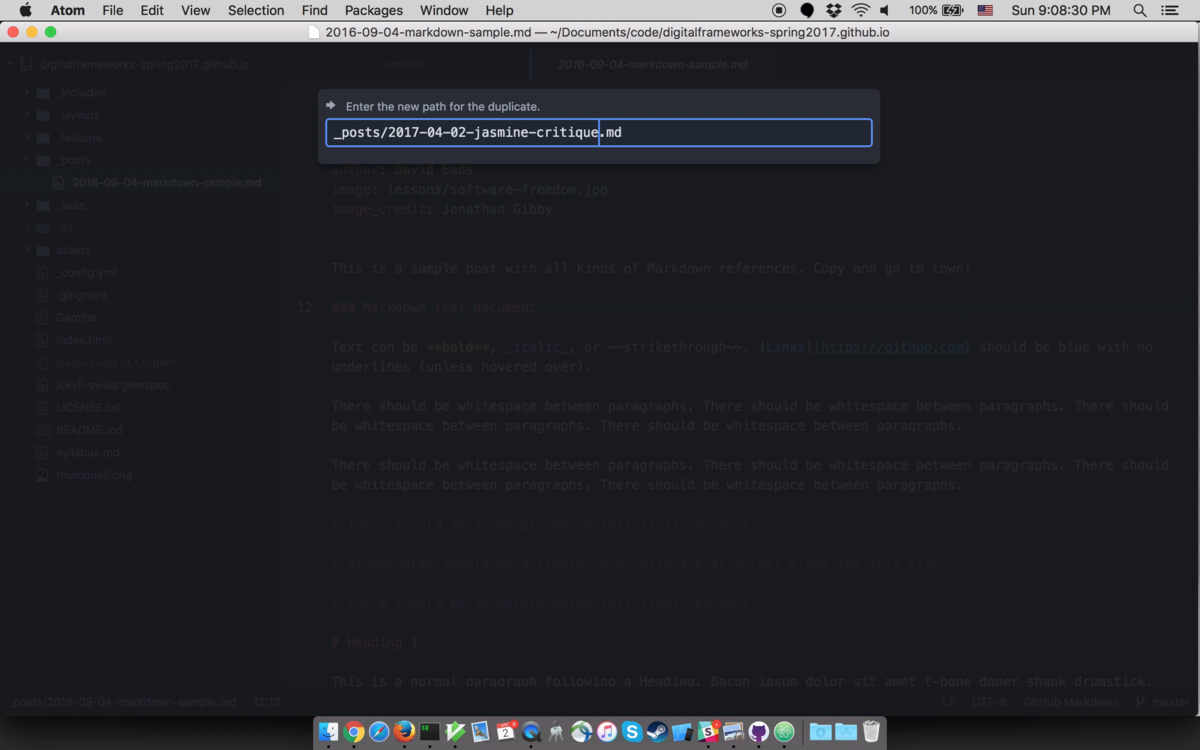
The easiest way to make your own post is to copy the one that’s there. Right click on Windows or ctrl-click on Mac the file called 2016-09-04-markdown-sample.md and select “Duplicate”:

What you call this file matters quite a bit. It should be of the form YYYY-MM-DD-<post-slug>, where YYYY is the current four digit year (e.g. 2017), MM is the current two-digit month (e.g. 01 for January), DD is the current two-digit day (e.g. 05 for the 5th), and <post-slug> is the so-called slug for the post. The slug is the name of the post as it will appear in URLs. Let’s say this is a student named Jasmine’s first assignment, a critique of a data graphic. The new filename should look something like this:
Now, edit the post so it looks like this:
---
layout: post
title:  "Critique of a data graphic"
date:   2017-04-02
author: Jasmine Minor
image: lessons/software-freedom.jpg
image_credit: Jonathan Gibby
---

This is the beginning of my post critiquing a data graphic.
The title, filename, author, date, slug, image and image credit will all vary based on whoever submitted their assignment.
Now you can add and synchronize your new post. Switch back to the Github Desktop app.
Commit and synchronize your changes
In the Github Desktop app, you’re probably currently looking at the repository history view. But now, at the top, you’ll see “1 Uncommitted Change.” That means you’ve made a change and need to commit it.
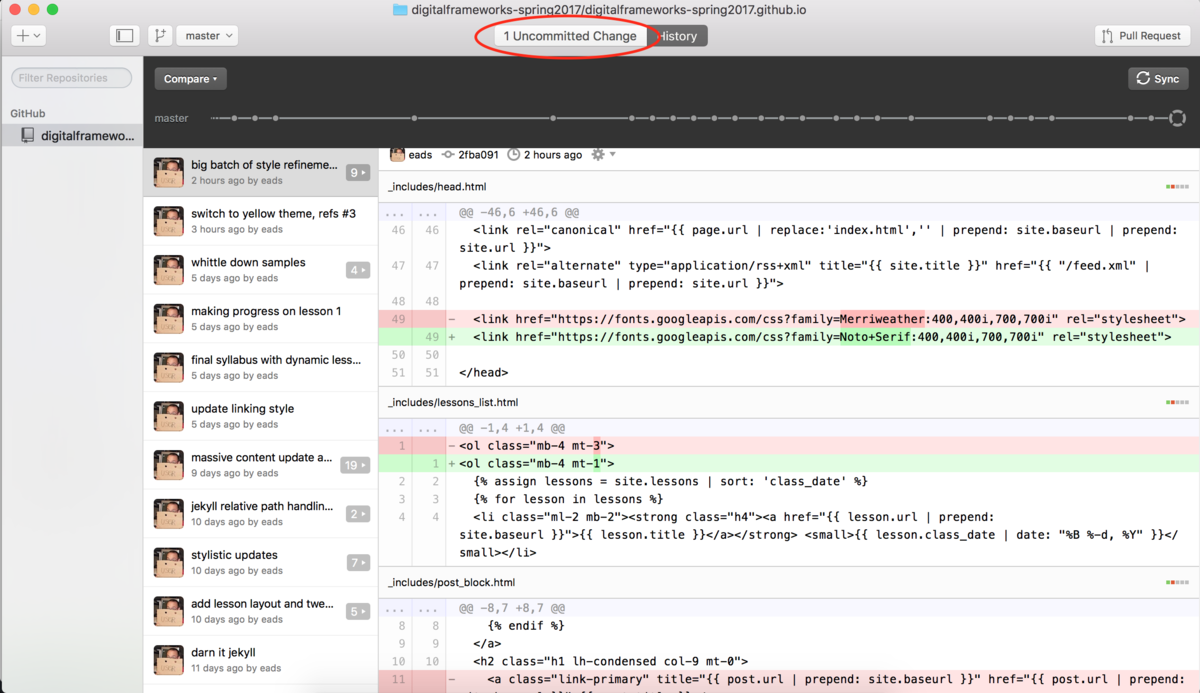
Let’s take a look at the next screen. What it’s showing us is everything that has changed since you last committed and gives you the option to write a little note describing the changes you made.
Put a short summary of your changes in the “summary” field and click “commit to master”
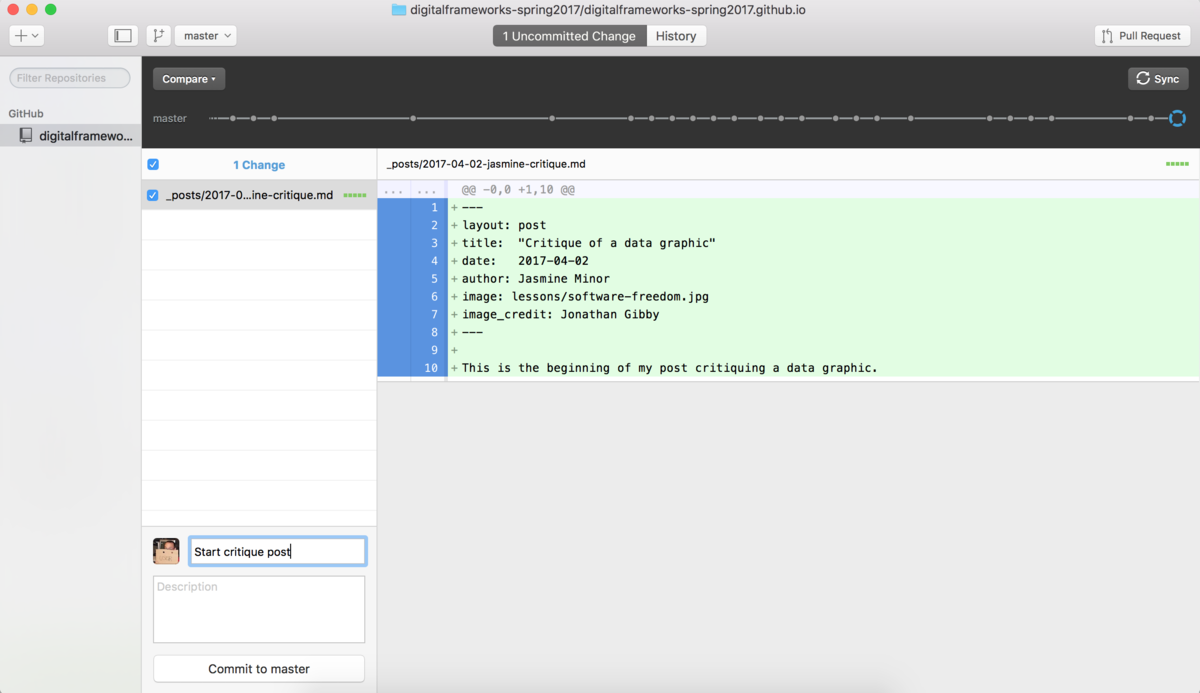
Your changes only live on your computer. To share your changes with the world, click the “Sync” button in the upper right.
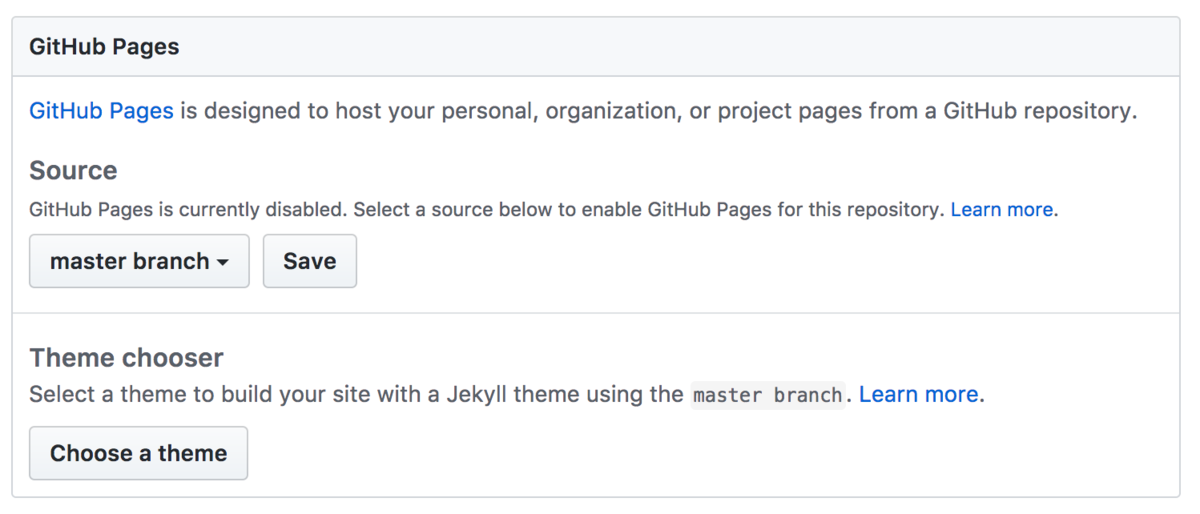
Enable website hosting
To preview your work and make sure it works properly, you’ll need to enable website hosting on Github.
Pull up the settings page for your Github fork by going to:
https://github.com/<YOUR-USERNAME>/digitalframeworks-spring2017.github.io/settings
When you’re done, you can scroll down and find out the published URL:
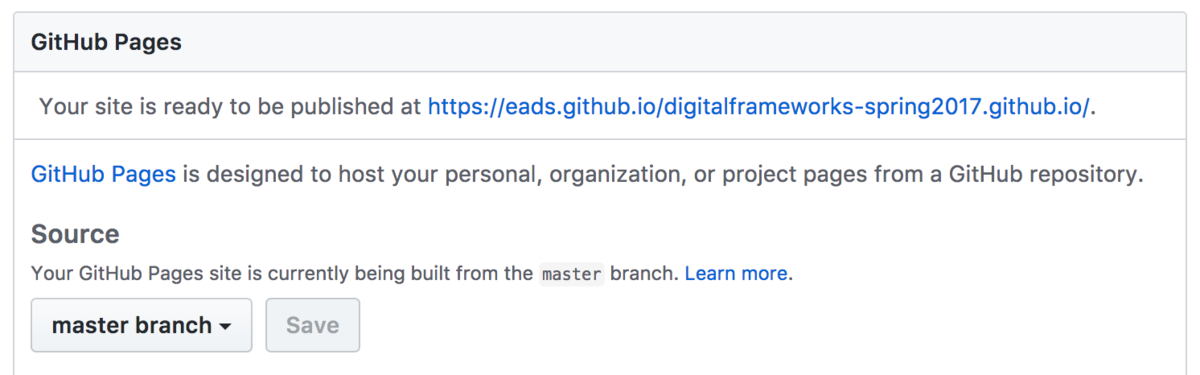
(Thing I won’t know definitively until class: If the build isn’t automatic, make another commit. That’s a good thing in all events.)
Create a pull request
The final step is to create a pull request. A pull request says to the person or group you forked from that you’d like to integrate your changes back into the main line of development (in this case, the main class site).
You should see an option to create a pull request associated with your latest commit at the top of the repository homepage found at:
https://github.com/<YOUR-USERNAME>/digitalframeworks-spring2017.github.io/
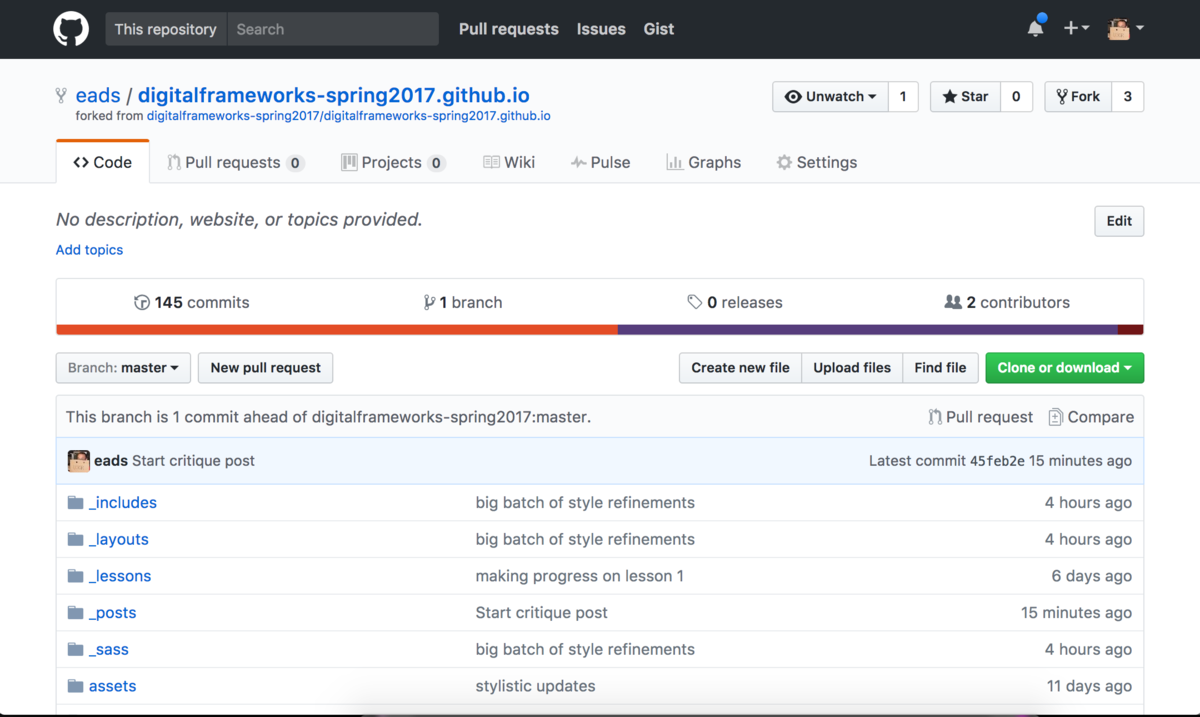
Click it to start creating the pull request. It will take you to a screen showing you what’s different between your version of the codebase and the main line of code.
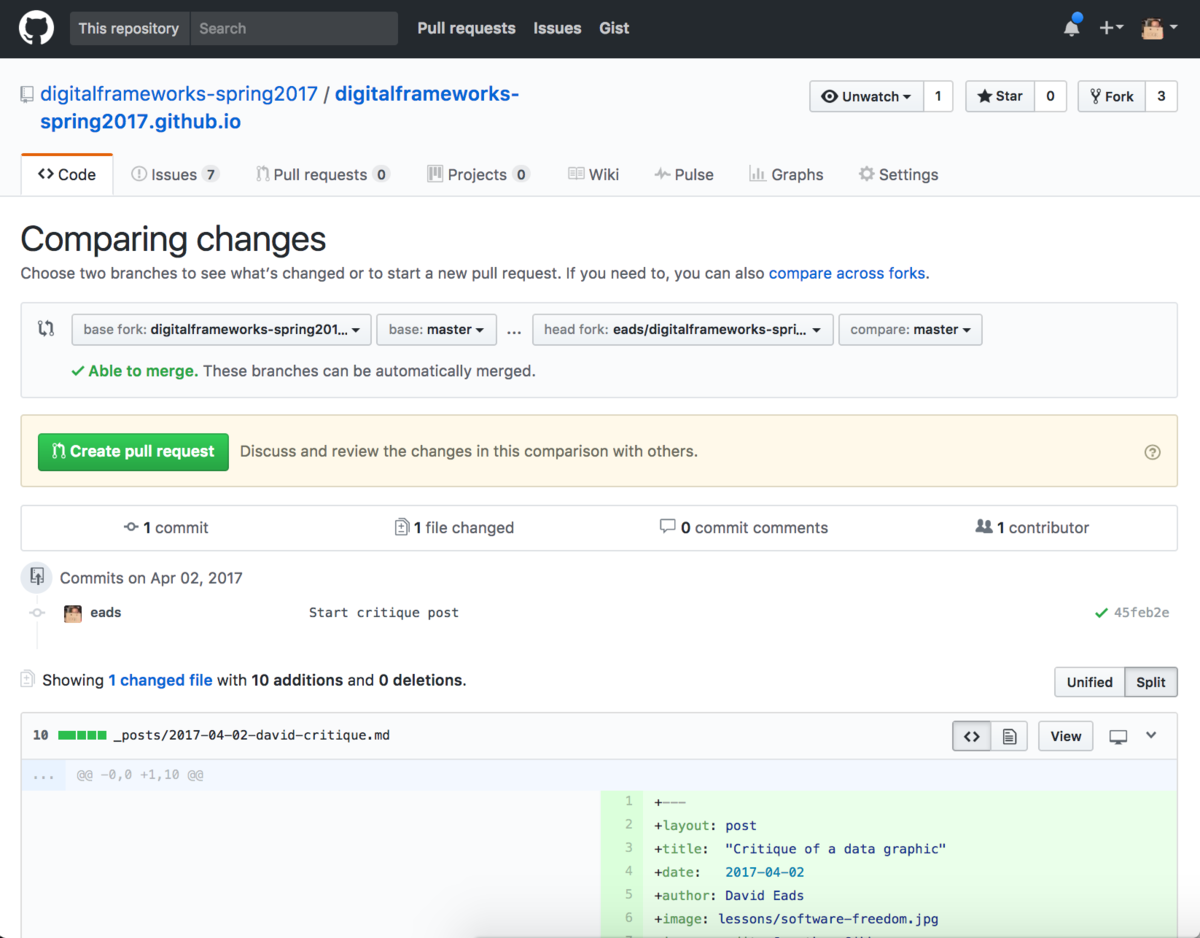
Click the big green button that says “Create pull request”.
Now, you must describe the changes – this is because a pull request can consist of many smaller changes.
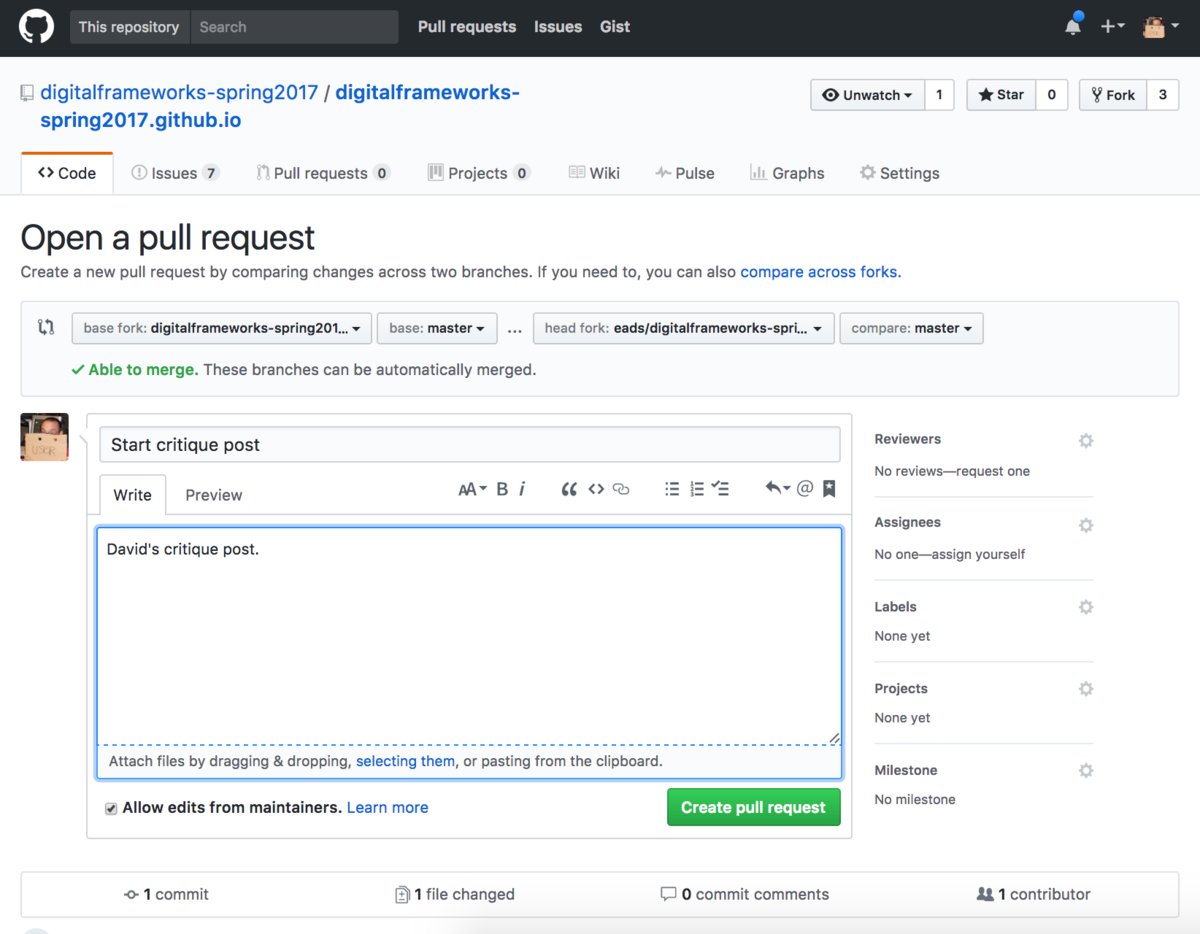
Click the big green button that says “Create pull request” on this page as well. That’s it! You’re done. I’ll take a look at your submission and provide feedback through Github’s commenting tools.
Mad science: Reproducibility, sharing, sustainability, and learning what you need
Okay so that was really painful. Most of the lessons aren’t nearly this complex and sloggy and full of magic. As I said earlier, there are people who take serious issue with putting this first because it’s unfriendly.
¯\_(ツ)_/¯
It is what it is. It should be easier. But you’re better off for learning it and practicing during the next ten weeks.
I used to run coding group in Chicago. It was very humbling because I’m an expert at this stuff and yet no one believed me that familiarity with Git and having code on Github was good for a person’s job prospects. People looked at me like “so you’re telling me the certification I want to get isn’t going to land me a gig and yet having some code on Github will?!?”
Then, one of our crew went to a job interview – just an internship, but her first professional development opportunity. The interview was going so-so until she showed the prospective employer her code on Github. She was given an offer on the spot. After that, the folks in the group were just a little less skeptical of me and my crazy ways.
So it’s good to learn version control and site building because it will help you professionally. The deeper reason to learn this stuff is because it reinforces two key themes of this class: showing your work and sustainable technical interventions.
Showing your work is important because it creates accountability. For example, you will be able to tell looking at the timestamps of changes to this file that I waited until the last minute to finish writing the lesson. But hey, that’s what happened. And you can also see how the lesson evolved, what mistakes were made and how they were fixed (or, god forbid, things that didn’t improve but got worse).
So it’s not just showing your work – it’s showing it in a way that captures the history of that work, whether it’s data, code, text, or anything else. That’s why version control is so powerful. While Git and Github are deeply confusing at first, they are the state of the art when it comes to managing complex, collaborative projects and creating a historical record that will improve your work and create accountability.
We talked about it less, but the static site building component of all this is also deeply important. This technology is significantly faster, more secure, more customizable, and cheaper to run than tools like WordPress. WordPress is great, don’t get me wrong. But for the kind of work we’re doing in this class, it’s a burden. With tools like WordPress and Drupal, you’re going to spend a lot of time maintaining the software by running upgrades, dealing with funky databases and broken plugins. With static site builders, you can fire and forget.
That’s why tools like WordPress are great for your day-to-day content needs, but static site builders are great for special projects and embeddable charts and graphs produced on a daily basis. For standard-issue content, the technical debt of WordPress is worth it because the authoring experience is rather nice – the friendly user experience is worth the on-going pain of running the platform. But for special digital publishing needs, the equation is inverted. In that case, it’s better to spend more time up front learning somewhat more abstract technologies so that you don’t have on-going pain. You’ll rarely, if ever, need to think about your content once it’s published.
We could go even deeper, because this process is a microcosm for many more technical concepts we’ll cover, like data structures, data formats, databases, markup languages, even copyright and licensing. Let’s wait on that until you have a little more practice with the tools.
Still, there’s one more lesson here worth mentioning now, and it’s that you don’t have to know or understand everything to do something. As a data journalist you need to be able to say, “I want to do X” (where X is publish a chart, clean up messy data, create an image of congress member’s faces, collaborate on a special project, etc) and make it happen. In the real world, that means doing some Googling, conducting some tests (smell tests, practical tests, etc), and trying out some techniques you don’t fully understand until you can get the thing to work. Once you get it to work, you’re still going to have questions and things to learn. That’s okay! This is the nature of the beast. And it’s part of why journalism is such a satisfying practice for a certain kind of restlessly curious person. If you’re really engaged, there won’t be a day that goes by that you don’t learn something new or deepen your understanding of how the foundational systems in our world work.
Copyright © 2017, David Eads. This lesson is licensed under a Creative Commons Attribution-ShareAlike 4.0 International License.